20 Ways to Use ThingLink in Education

When I first learned about ThingLink late last summer, I was immediately impressed. My mind started racing about all the ways that ThingLink could be used by teachers, students and even beyond the classroom. If you’re not familiar with ThingLink, it makes images interactive. How do you make an image interactive? You upload a still image to ThingLink, and then you can add little icons on top of the image. Those icons become hyperlinks to other web media- websites, articles, videos, sound clips, and much more. Not only can you link to external content, but students can type their own responses onto an icon. I’ve embedded a ThingLink featured example by Molly below, so you can see it in action.

Now tell me that isn’t AWESOME?!

So, now that you’re hooked, what are some of the ways you could use ThingLink in your classroom? I’ve just included the tip of the iceberg below; the ideas are truly endless.

  1. Have students create one for a summative assessment in place of a typical test.
  2. Use a book cover image and have students include links about the book, characters, plot, etc. for an end of book project.
  3. Use the image of a map, and include links with information about the area, like this one, or this one, or this one.
  4. Use an image of a person or character and include links about their life and their important contributions to history or the topic being covered.
  5. Include an image of a body system and include links about how it works. For example, the skeletal system.
  6. Foreign language teachers (or ESL/ELL classrooms) could use an image of a familiar scene, like a family cooking in the kitchen, and include links to recorded sound clips about what’s going on in each part of the picture in the language being studied.
  7. Create a “getting to know you” ThingLink using a group photo and include links to teacher’s websites, bios about seniors for senior night, etc.
  8. Use it as a beginning of the year/course ice breaker by having students upload a picture of themselves and including links to content that describes them and things they like. Students can comment on one another’s published ThingLinks.
  9. Search the database of ThingLinks others have created and shared to see if there’s already something out there you can use.
  10. Create an entire lesson in one ThingLink, by including links to sound clip instructions, video content and links to assignments or quizzes.  See a great example here.
  11. Use the image of a book cover and include a video link to the book trailer to preview the book before reading it.
  12. Scan and upload an image of a worksheet, and include links to videos and websites that will help them solve the problems/answer the questions if they get stuck.
  13. Have students create a portfolio by linking to their work in all other webtools you use in class: blog posts, videos they created, scanned images or pictures of non-digital work.
  14. Depending on how big your school is, you could create and upload a map of your school. Then include a link over each classroom to information about that teacher, like their Twitter handle, class website, class LMS page(s), a written bio right in ThingLink, a recorded welcome sound clip from that teacher, etc.
  15. Create an image collage, upload it to ThingLink and then include links about each image. For example, you could create a collage of different geographic land forms like this one.
  16. Upload a picture of the periodic table of elements and include a link to a video or information about each element (or the ones you’re studying at the time). Sort of like the Periodic Videos site.
  17. Include links to videos demonstrating how to preform certain skills, like this push up example.
  18. Upload an image of your school and include links to information and videos about your school: clubs and activities you offer, your mission statement, academic offerings, promotional videos, and more. Then embed it on your school’s website!
  19. Put a twist on Friday’s current events discussion by asking students to not only find an article, but find an image that relates to their chosen event/topic, upload it to ThingLink, include a link to the original article as well as other links, videos, etc. that relate to the article and what you’re studying in class. You could even ask the students to include a link to an audio recording of themselves discussing their current event.
  20. Create instructions for a new website, device, or process like this one.

One of the things I like the most about this tool, is that no matter the project or access to technology, you can incorporate ThingLink into your class. You, as the teacher, could create one that students will use to preview/review information or complete an assignment. Students could work in groups or on their own to create one, depending on their access to technology and devices inside and outside of the classroom. If you have very little access to technology in your classroom and you still want students to create their own, you could assign individual students or groups pieces of the project to research and prepare. Then have the groups take turns adding their links to the full class ThingLink image. As you can see with how all over the board these ideas are, there are so many ways you could use this tool in an educational environment.

How are you using ThingLink with your students and in your schools? If you’re using it, please share a link to an example in the comments.

Tech To You Later!
-Katie

Learning to Drive

In February, our district will begin state testing.  Once testing begins, there will be at least one grade level in at least one school in our district testing every single school day until May.  This big span of time marks the third round of testing this year. We are not alone. Toss that around in your head for a minute or two.

I’ll spare you my soap box about too much testing and where the focus has gone in education; you likely feel the same way (if you’ve got some time, or you’re just as passionate as I am about these issues, I do suggest you head on over to Nancy Chewning’s blog response to TIME Magazine’s Rotten Apples article that was featured in the Washington Post).  However, it is worth mentioning for the point of this blog post that with so much time dedicated to state testing, which influences districts’ report cards and teachers’ evaluations, there obviously becomes a heavy focus on testing and preparing students for the test.

Teachers are working so hard not to teach to the test, while at the same time making sure students are as prepared as possible for the tests- the scores of which will directly impact their own livelihoods.

I’ve gotten a lot of questions the past few months for websites that teachers can use with students to help them practice the PARCC tests and the digital skills needed for these tests. Many students in our district have had very little experience with technology outside of the school building. Even inside the buildings teachers have to share carts, so it is possible for students not to use any devices for a day or more at a time. Teachers and administrators want students to practice skills like typing, using the trackpads, dragging and dropping, typing in text boxes, etc., so they are prepared for test day since they have had such limited experience with these skills. Many have asked for practice test sites, which mirror the actual tests in order to practice these digital test skills.

I wholeheartedly agree that students should be exposed to these types of activities before seeing it for the first time on a high-stakes test. But I do not think students should be practicing these skills alone, with the exception of learning to keyboard initially.

Take the following example. When you learned to drive, you learned what to do at a traffic light: red means stop, yellow means slow down (or speed up for some lead-footed folks), and green means go. You did not have to practice driving in a new city before you could actually drive there and navigate those traffic lights, right? You now apply your traffic light knowledge when you approach all traffic lights, even though they may not be on the exact streets where you initially learned to drive.traffic light

If I am creating a digital learning environment for my students to the best of my ability and with the resources available to me, at the very least they will have experience with text boxes, dragging and dropping, using a trackpad and more. If I’m a math teacher, I can create lessons where students are measuring the angles of a baseball field using a protractor and other digital manipulatives. If I’m an English teacher, I can have students use the TextHelp Study Skills add-on in Google Docs to highlight certain parts of speech in certain colors to practice using a highlighting tool. These examples would give students real experience using those specific tools on a regular basis- not just experience using them on a practice test question inside of a practice test.

Students will learn digital test skills when they are infused in instruction; those skills do not need to be practiced in isolation. When students are familiar with digital tools and skills in your classrooms, they will be able to navigate and use the tools on any assessment- even if they look slightly different. After all, we still know what to do at street lights when the colors are slightly brighter or more dull, the posts in which they hang on are higher or lower than what we’re used to, or the traffic lights are hung on a street post near the sidewalk or above the street, correct? Our memory recall kicks into action and processes what to do at the lights, even when they are slightly different from our own home towns. The same thing goes for using digital tools on assessments if we use them in daily/frequent classroom activities and then see them on an assessment.

We learn through experience. We apply what we know. We adapt when necessary.

So what do you think? Do you agree or disagree with me about practicing “digital test skills?”

Tech To You Later!
-Katie

Lunch & Learn: Teachers Spotlight EdTech Successes

April marked the last of this years monthly Lunch & Learns, where teachers were invited to bring their lunch to the library during their lunch bell on a designated Thursday each month.  I wanted the last session to spotlight some teachers throughout the building, and allow them to present some of their edtech success stories.  I’m happy to say that I had trouble narrowing it down to 4-5 teachers from each lunch bell!

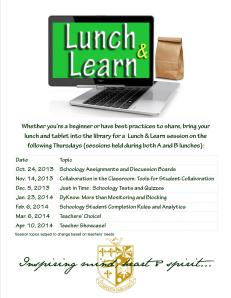
lunch and learn informationTeacher presenters ranged from 5 to 40 years of experience teaching, and the tools they presented on also ranged in tech-ability level. I asked teachers to answer the following questions in an 8-10 minute presentation of the tool.

  • What was the activity/project and how did you decide on having students use this particular tech tool? How was this different than the traditional project/activity you previously used? How would you change the project for future use?
  • How much were you involved with setting up the technology portion of the project for students? How long did it take? How difficult was it?
  • What were the results? How did this improve/enhance student learning? How did the students respond?
  • If there is an opportunity to quickly interact with your tech tool, I’d like to do that with the teachers.

I filmed each of the teachers’ presentations and uploaded them into the corresponding Lunch & Learn resource folder on Schoology.  Teachers asked the presenters a lot of questions, and there was a lot of great brainstorming going on.  I know some teachers have already implemented some of these tools after seeing them presented at the Lunch & Learn.  A brief summary of each of the highlighted tools are below.

Word track changes/review tools– Word has a handy feature that allows you track your and student changes, add comments and more. This is a great way to grade papers, so your students can easily see all your comments and suggested changes. It’s also a great way to see peer-editing progress.

Screencasting– Screencasting records whatever you’re doing on your screen and you can also record your voice giving instructions. Screencast-o-matic (screencasting tool) allows you to download your video to your computer or upload your video to the their website or YouTube and share the link with anyone.

VoiceThread– VoiceThread is like an audio discussion board. You can upload a picture or even a PowerPoint presentation and record your voice over each slide. Students can create audio comments on each slide too. Both you and the students also have an inking option that is recorded/played back as you speak as well.

Weebly– Weebly allows you and your students to create websites/portfolios. It is an extremely easy platform to use. There is also a blog feature. You can manage your students sites and they can be password protected.

Symbaloo– Symbaloo is a visual bookmarking site. It’s an easier way to keep track of all your favorites and website resources for students.

Kahoot!– Kahoot is an awesome, interactive, quiz game. It’s similar to a BDubs trivia game; the less time you take to answer the questions, the more points you get. You can download the results to see what each student answered, how much time they took, etc. It’s really easy to set up and the kids LOVE it!

Wikispaces– Wikispaces has a great educational side to their wiki platform. Wikis are a great place for students to complete group work because you can track all the changes they make and students can work on the wiki from anywhere-they don’t have to be together. They have a project side to the wiki that allows you to put students into groups, and only those students have access to their group pages.  Wikispaces was highlighted at a Lunch & Learn earlier in the year and caught this teacher’s eye to implement.

Blogs– Our creative writing teacher showed off her student created blogs in WordPress and how she manages them.

Minecraft– Our Latin teacher talked about how letting his students use a tool they were comfortable with (and he was not) transformed an okay project into a really awesome experience. His students researched important buildings and places in Roman/Latin history.  Previously they had to create the building out of a clay, a diagram, a drawing, etc.  He allowed his students to use Minecraft and was blown away by the detail they were able to put into their creations.

Read about all the Lunch & Learns this year by clicking here. How do you spotlight teachers and encourage teachers from different subject areas to engage in conversations about best practices together?

Tech To You Later!
-Katie

#DigCit Day for High School Students

Now that our school’s Digital Citizenship (DigCit) day is right around the corner, plans are really starting to fall into place.  I haven’t been this excited for something in a while-and it’s for work!  That’s how I know I’m in the right field :).

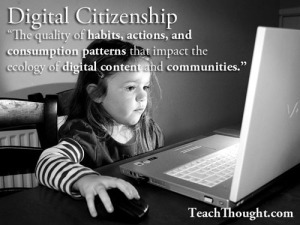
the-definition-of-digital-citizenshipIf you’re wondering what exactly is digital citizenship right now, I suggest you check out this article by Terry Heick on teachthought.com.  He does a great job explaining everything digital citizenship encompasses.  The picture definition to the left is from his blog post, and I think it is fabulous! There’s also an awesome infographic at the bottom of the post you have to check out, too.

We’ll be starting off the DigCit day with a presentation from Steve Smith with Cincinnati Bell Technology Solutions.  Steve travels to local high schools and puts on a very informative presentation about living in a digital world, the dangers and the ramifications of a negative online presence.  I saw his presentation at another school around Thanksgiving, and I knew it would be a great introduction to our DigCit day! If you live in the Cincinnati area, you’ve got to bring him to your school.  Best part about this presentation- he does it for FREE!

In November, I presented the idea of a DigCit Day to the teachers at our faculty meeting.  We discussed different possibilities, and I asked them for their input on the day since they will be such a key part of the execution. The feedback I received showed a majority of the teachers were in favor of a full day session.  Once we’re finished with the Steve Smith assembly, students and teachers will proceed throughout the day with their normal class schedules (students will go to their regular classes with their regular teachers).  Each department has been designated to teach a certain area/topic related to digital citizenship. I tried my best to align topics to departments that fit with their content areas.  Teachers have been given the option to team teach their topic with their students if they feel more comfortable doing so. Topics by department are below.

  • English
    • Email Etiquette
    • Online Security & Privacy (information, passwords, and social media location check-ins)
  • Fine Arts
    • Copyright, Fair Use
    • Protecting Online creativity
    • Creative Commons
  • Foreign Language
    • Outside speakers coming to discuss the hiring process and how businesses check social media before hiring people. Speakers include recruiters from TQL, School Outfitters and hopefully, at least, one more person
  • Business/Tech
    • An extension of the Foreign Language department- more student centered
    • Hiring Process & ramifications w poor representation
    • Importance of keeping social media clean and your digital tattoo
    • Will look at some examples, including the storify I made, and check out their own profiles
  • Health & Gym
    • Abuse of Technology & the Effects on the Mind and Body (excessive video gaming, obesity, low self-esteem and depression from cyberbullying, etc.)
  • Math
    • Cyberbullying
    • T.H.I.N.K. before you “speak” (also part of the official logo for the day)
    • Upstanders vs bystanders
  • Religion
    • What does your online presence say about you (from the opinion of others) & your digital tattoo
    • “Selfies” & online affirmation
    • Sexting/snapchat
  • Science
    • Responsible disposal, recycling, and life-cycle of e-waste
  • Social Studies
    • Legal professionals/guest speakers will be talking to students about the legal Issues facing (cyber)bullying, sexting and child pornography- I’m still trying to nail down a few speakers for this area
  • SAIL (Special Accommodations for Identified Learners), Study Halls, Repeat lesson (ex. student has two math classes, so they would get the same lesson twice)
    • Our Librarian will be holding a separate section for these students in the library about website/digital content evaluation for research.
    • If a student runs into a situation with a third repeat session, they will be sent to an area they are missing

I’m going to make a paper “digital passport” that each student will receive during their first class.  Each subject area will have a place to stamp on the passport. This will help keep track of students and any double lessons.  I’ll be posting all of the lessons from each department after the day, but in the meantime click here to see some DigCit resources.

I’m currently in the process of meeting with each department to share the resources I’ve collected and finalize their plan/lesson for the day, together. I think it’s really important that the teachers decide on their final plan, since they’ll be the ones carrying it out. This allows them to take ownership for the day.

This week an anonymous survey was sent to all our students to gain some perspective on our population.  It asks questions about cyberbullying, sexting, online privacy, copyright, social media, parental involvement and more. I’m going to provide each department with the feedback that pertains to their DigCit area, so they can share the results with students on the day (students don’t know about the day/date yet-it’s going to be a surprise for them).

Digital Tattoos for students

Temporary (Digital) Tattoos for students using our school logo!

I also plan to hang some infographics (using student survey feedback) and other DigCit posters around the school. SPOILER ALERT: students are all going to be receiving a temporary, stick-on tattoo to represent their digital tattoo (to the right)! A HUGE thank you to our Librarian and Web Master, Anne Jones, for making this and two other official logos for the DigCit day! If you could see my draft of ideas (if you can even call it that) and the final products she came up with, it makes it even more impressive.  I’ll share the other two after the day; they’re even cooler!

After the DigCit Day with the students, I’m going to plan an informative parent session (maybe call it DigCit Night?). I’m hoping to get one teacher to volunteer from each subject area to talk to the parents about what their department did with the students. I also believe schools cannot fight the digital citizenship and social media battle on their own; parents need to be informed and allies to schools and teachers. We’ll provide parents with resources to talk to their kids about digital citizenship at the parent info session.

I’ve got a few other tricks and surprises up my sleeve for the day, but I’ll wait to share those.  Follow along with the progress and reflections about our DigCit Day on my blog with the DigCit Day tag.

So, with a few weeks left to finalize and plan, what am I forgetting? What tips and resources do you have to share? What must-do activities can you recommend? What do you think?

Tech To You Later!
Katie

Celebrate Your Colleagues

Educators are all in this field because we like to help and support others, right?  However, due to the traditionally isolated nature of our profession, we can often feel disconnected from one another.  A teacher on one side of the building may have no idea what is going on in another teacher’s world.  We rarely get a chance to shoot the breeze with one another while running around to get 30,000 things done in one day.  We spend a lot of our time building relationships with our students (as we should!). But unless you’ve got a well-oiled PLC culture, we don’t always get a chance to build strong, positive support systems with our coworkers. 

December brings a lot of stress to get every last bit of content in before the new year, the pressure of exams, and excitement for that mid-year break that we all desperately need.  It’s cold out, it gets dark early, and it’s easy to fall in a slump this time of year.

Instead of trying to stay positive on your own, I’d like to encourage you to take some time out of your crazy day to offer some encouraging words to another teacher (even better if it’s someone you don’t normally get a chance to talk to).  Acknowledge their hard work.  None of us are in this line of work for the recognition (if you are, get out now because it’s a thankless profession more often than not), but think of how good you feel when someone does compliment your hard work.  I promise you’ll feel even better when you know YOU are the one who gave someone else that glowing-feel-good feeling.

So before you shut down that computer (or iPad, or tablet, or ChromeBook), and say “see you next year!” to everyone on the last day of school in 2013, celebrate your colleagues!

bestedtech awardsI’d like to take this chance to celebrate two of my colleagues now for their efforts to incorporate technology in the classroom.

Our CPII Freshmen English teacher, Ashley Markesbery, used Twitter and Storify to help students write a collaborative paper and interview people for the first time. Students had to interview other students and faculty members around the building by asking them a series of questions and then Tweeting the answers using a class #hashtag. In groups, students chose the best tweets and pictures after looking through all students’ tweets via the #hashtag. Each group used Storify to aggregate their favorite tweets. From their group’s Storify story, each student wrote their own individual paper. Ashley has been nominated for Ohio’s first ever #BestEdTech Awards in the Best Use of Social Media in the Classroom Category.  Very cool use of Twitter and Storify, Ashley!

Art teacher, Mel Gaskins, has turned her classroom into a thriving educational technology hub-spot for students. She has architechture students using Houzz and Pinterest for idea boards as opposed to cutting out fabric swatches and pictures from magazines.  Students from her independent art studio, ceramics, and architecture classes use Rhino, Illustrator, Photoshop, Auto Cad, and different iPad Apps to create their projects in her class. Mel also initiated an in-house quad-blogging project with two other teachers in the building (English and Religion) where Mel’s students blogged about Art reflections, and students in the other classes commented/blogged from their respective subject area views. Mel is currently seeking out a way to bring a 3-D printer to the building for her sculpture and architecture students. Lastly, she is working on setting up a department blog to give all our fine arts teachers and students the chance to collaborate in one spot.  She is constantly brainstorming ways to reinvent her class and use educational technology to ensure her students continue being accepted into very competitive art and architecture programs around the country. Mel, very deservingly, has been nominated for Ohio’s first ever #BestEdTech Awards in the Teacher Innovator Category!

Help me vote for Ashley and Mel until January 10th by clicking here.

I’d like to leave you with a quote and a question.  How will you celebrate your colleagues this year?

“When we give cheerfully and accept gratefully, everyone is blessed.”                         -Maya Angelou


Tech To You Later!
Katie

Lunch & Learn: Teacher EdTech PD

Since October, I’ve been putting on monthly Lunch & Learn PD sessions for teachers.  December was dedicated to tests and quizzes in Schoology (our new school-wide LMS).

As usual, I shared the results of the pre-survey I send out to teachers a week before each session.  I use these surveys to see what teachers are already doing with the tool(s) we’ll be discussing at the Lunch & Learn and what they want to learn. I share the results for three reasons.  First, I want teachers to see why I’ve chosen to cover certain areas of the tools (based on their responses).  Secondly, I want teachers to see I am taking their input into consideration, so they will know I value their time and opinion.  Lastly, I want them to know where they stack up compared to their colleagues, and see that they are not alone if they aren’t a technology wiz.

lunch and learn teacher pdBefore we began learning anything, I had the teachers take a “pop-quiz.”  This six question quiz included one of each of the six question types you can add to a Schoology test/quiz (multiple choice, true/false, matching, fill in the blank, ordering and essay). It was truly more informative to highlight the question and answer options.  I also wanted them to experience the students’ perspective when taking a test/quiz.

Once they had become familiar with all the test/quiz options, we discussed the possibility of using the “test/quiz” feature for interactive and in-class assignments.

We quickly looked over question banks and how to grade the quizzes (questions that don’t grade themselves), and then they had the rest of the time to start building a quiz (or an assignment). As always, I wish we had a little more time so they could have gotten a full quiz (or assignment) built and saved into a question bank.

To check out my Prezi presentation for the Lunch and Learn, click here.  To read about October’s Schoology assignments and discussion boards L&L session click here; and to read about November’s collaboration in the classroom L&L session, click here.

How do you use your LMS’ test/quiz feature as interactive assignments?  What do you think of online quizzes?

Tech To You Later!
Katie

Backwards EdTech Flow Chart

I’m a very visual person, so naturally I’m drawn to charts, diagrams and anything that I can look at and understand.  I’ve made a couple other charts to help people pick technology tools based on Bloom’s Taxonomy and web tools by category.  I’m particularly proud of this new chart that I’ve been working on for quite some time!

Backwards EdTech Flow Chart

Click this image for the full version!

I truly believe technology enhances the classroom, but I never think it should be used just for the sake of using it.  This is another visual I created to help teachers select the right technology tool for the job. I hope it helps you think backwards (or rather the “right” way) to think about selecting a technology tool to use in your class.

It starts by asking what you want students to do, and then you pick a goal, such as explain a concept.  Follow the diagram until you either reach a list of tech tools to help you or your students complete this task or you reach a prompting question, such as “do you need them to do this verbally?” Based on your yes or no answer, you’ll finally come to a list of edtech tools.  All the tools found on the web are hyperlinked.

If you’re not a visual person like myself, scroll to the second page that is just a list of the goals  and all the corresponding links (no prompting questions).

For this, the Bloom’s and the web 2.0 by category chart, visit my website!

What tools or goals would you add to the chart?

Tech To You Later!
Katie

Collaboration in the Classroom: Teacher PD

The second session of my Lunch & Learn series took place today.  It was the session I was most looking forward to in the whole series- Collaboration in the Classroom: Tools for Student Collaboration!  This session focused on Google Docs, Linoit, Skype and Wikispaces.

As always, I began with a pre-survey of teachers’ current use.  I asked for three pieces of information to plan the 50 minute sessions.

  1. Describe what collaboration looks like in your classroom.student collaboration
  2. What tools do you currently use for student collaboration?
  3. What do you hope to get out of this session?

I made word clouds in Tagxedo out of the first two questions, which I included in the Prezi for the session to share their responses.

collaboration in the classroom teacher pdBased on feedback from the first session, I wanted this session to allow more time for teachers to get their hands dirty and use the tools.  So I started out with a brief introduction, and then had them dive right in!  I had Tablet PCs set up all around tables, each labeled with the tool set up and signed in on that machine.  Beforehand, I had created multiple accounts to be used during this session (three accounts for Google Docs to simulate three students, etc.), so we didn’t have to waste time creating accounts, logging in, and getting set up.

Teachers had about 20-25 minutes to explore the tool in front of them with a few other people in their group (“tasks” for each tool are listed at the bottom of this post under each tool). I walked around to help groups when needed, but for the most part teachers were really able to just dive right in and start exploring. There was even a person across the library, so the Skype group could actually practice Skyping.

We came together for the last 15 minutes of the session, and I asked each group to share what they had found out about their tool.  I filled in the blanks to make sure the big points were touched on.  If I had more time I definitely would have rotated each group, so they could have all tested each tool before coming back together to share.  So far, the post-survey responses seem to be in agreement that teachers would have liked more time on this topic and they all learned something they will apply to their classes- YAY! I heard a lot of “let’s meet to set this up for my class…,” which is music to my ears!

I provided resources for each tool in our PD Course in Schoology for reference at a later time.  I’ve included some of that info below (with the exception of links to our practice examples).  I also gave teachers all the test account log in information, so they could play around with it on their own if they wanted to do so before diving in and setting up their own accounts.

Google Docs
What to do:

  • Edit the email document
    • Use the chat feature
  • Add info to spreadsheet
    • Find sum and average years of teaching experience
  • Add a slide to a presentation
    • Make a comment on a slide
  • Create new Google Doc
    • Share it

Google Drive home
Google Docs in Plain English
Google Docs Tour
Tips Every Teacher Should Know About
Google Drive/Docs Help
Sync Google Docs with Schoology

Linoit
What to do:

  • Post idea for using Linoit with students or coworkers
  • Send post by email
  • Post a picture or video

Linoit Home
Sign Up for Linoit
Linoit How To
Tips, Tricks & Ideas for the Classroom
50 Ways to Use Linoit in the Classroom

Skype
What to do:

  • Video call other Skype Team
  • Do a Mystery Skype
    • Use the location in the Mystery Skype folder to answer questions
  • Find a lesson or guest speaker from the Skype in Edu website you could use/bring to your class

Skype in Education
How Do I Join Skype?
Download Skype
See Skype in Action
50 Ways to Use Skype in the Classroom

Wikispaces
What to do:

  • Participate in the discussion on the home page
  • Access team page and add to the table
  • Make a new team page
    • Add “Widget” to new page
  • Edit About McN page
    • Add a fact
    • Make a comment

Wikispaces Home
Wikis in Plain English
50 Ways to Use Wikis
Wikispaces Help
Getting Started with a New Wiki

To check out the Prezi that describes and highlights each tool, click here.

What do you think of this format?  How have you used these tools in your class?

Tech To You Later!
-Katie

Untangling the Web: Perfect Summer Read

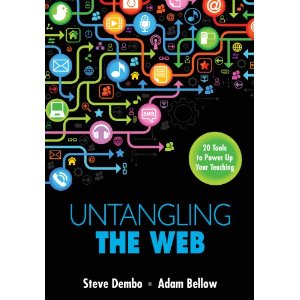
At the beginning of the week I purchased Steve Dembo and Adam Bellow’s Untangling the Web: 20 Tools to Power Up Your Teaching. I was so impressed by Bellow’s ISTE 2013 Keynote that I had to read his book, and I’m glad I did!

Untangling the Web: 20 Tools to Power Up Your TeachingDembo and Bellow give a detailed description of 20 web tools that any teacher could use in his or her classroom. I was already familiar with a handful of the tools mentioned in the book, but I still learned a great deal about each one of them. This is an excellent resource for any educator, whether they are new to technology in the classroom or an experienced edtech user! Best of all, you get a great sense of what each tool can do without feeling like you’re reading the entire Twilight series; the book is a very quick read!

My favorite aspect of this book is the versatility of each of these tools.  Scrolling through my Twitter feed and some of my favorite edtech online resources, I often feel like so much stuff is aimed at elementary and middle school students or iPad, Android, and mobile users.  Students at my school (grades 9-12) use Tablet PC’s (basically a laptop that you can write on the screen), so I can count any tools that stop at a tablet or mobile app out of our repertoire.  Every single web tool mentioned in the book can be used at any grade level and is intended for a computer, with many of them being mobile/app compatible!

This is the perfect book to read while you soak up the last of the summer sun before returning to school this fall.  It will leave you with tons of ideas to immediately incorporate into your teaching next year.  I’d love to hear what you thought of the book and how you plan to use some of the tools they featured.

Tech To You Later!
-Katie
Tablet PC and Web 2.0 Tools for High School Students by Category

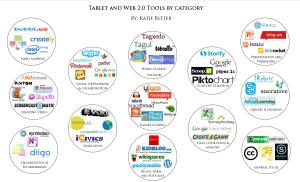
In the fall of last year, I created a Blooms Revised Taxonomy Technology Chart that I used with my faculty for PD.  Since then I have used that chart multiple times when I meet with teachers to help them incorporate technology into their lessons.  Looking at the chart I realized it’s probably overwhelming for someone who doesn’t know what each logo and tool is or what it does.

Tablet and Web 2.0 by CategoryI decided to make another chart that groups different technology tools together by category.  This way, teachers could look at the chart and easily convert a traditional classroom activity or report into using a technology tool.  For example, instead of taking class time to brainstorm as a group, teachers could tell students to brainstorm on the class lino board at home, and then they could discuss the ideas and get right to work as soon as class starts.  A teacher may never have heard of Lino before (hey, I hadn’t before ISTE 2013!), but by looking at this chart they would know it was a collaboration tool and could go from there.

Tablet and Web 2.0 by Category with clickable links to each site.

It’s only a start at organizing so many tech tools out there for the classroom.  If you know of some tools that would be worth adding or think an entirely different category of tools should be added, please comment on this post!  I’d love to take your suggestions and add them to the chart.

Tech To You Later!
Katie